Life is full of little small choices, and then there are the big decisions. Namely, 70-200mm f2.8 on a 1.3x crop or 400mm f2.8 on a 1.5x?
I recently had the opportunity to shoot a couple of football games for the paper I work at, The Daily Californian. It was my first time shooting football game, and as someone who’s generally not been very good at sports photography, I was definitely a bit nervous.
Both games I shot were in pretty good light – the UC Berkeley/California vs. Michigan State game started at 5pm, so it played from daylight through to just about dusk in the 4th quarter. The Washington State game began at 3pm, so it was pretty much daylight except for a bit of (rather nice) sunset light at the end.

Sunset at halftime at Memorial Stadium, UC Berkeley
Equipment analysis – Week 1 vs. Michigan State
The biggest difficulty with football with regards to equipment is covering action that happens over a vast expanse (over 5000 m2 of field area) that can be traversed by speedy athletes in a matter of seconds. So while you might be sitting nice and cozy with a 300mm lens that perfectly covers the action mid-way across the field, all of a sudden the quarterback can fire off a deep pass or the running back finds a hole and flies off, and you’re stuck without the ability to get the shot.
I went into my very first football (2008 Aug 30 against the Michigan State Spartans at home) with the mentality of a photojournalist – cover the event in its entirety, capturing every player, every moment, and not missing anything critical. To that end, I decided on the following setup the first time out:
Long range: Canon 40D with 1.4x and 70-200 f/2.8 IS (35mm equivalent: 157-448mm f/6.4)
Midrange: Canon 1D Mark II with 70-200 f/2.8 IS (35mm equivalent: 91-260mm f/3.6)
Wide: Canon 5D with 24-70 f/2.8 (35mm equivalent: 24-70mm f/2.8)
Ultrawide: Canon 5D with 12-24 f/4.5-5.6 (35mm equivalent: 12-24mm f/4.5-5.6)
Between the equipment I had on hand and pool equipment from The Daily Cal, this was probably the best setup I could scrounge up. During the game I found the setup to be fairly versatile – I could cover the action on the other end of the field fairly adequately (although at an f/6.4 equivalent, the quality wasn’t fantastic), and by the end of the game I was getting a handle on the technique of dropping the long-range lens onto my shoulder and quickly slinging the midrange setup out whenever the big plays broke. Here’s some stats on the shots I turned out from the game (after cutting down to the ones I’d actually upload to the Daily Cal):
344 total shots
Canon 1D Mark II with 70-200 f/2.8 IS: 139 shots (40.4%)
Canon 40D with 70-200 f/2.8 IS and 1.4x: 148 shots (43.0%)
Canon 5D with 24-70 f/2.8: 54 shots (15.7%)
Canon 5D with 12-24 f/4.5-5.6: 3 shots (0.9%)
The numbers change somewhat dramatically, however, when you look at the subset of best shots I actually pulled for inclusion into my gallery for the game:
36 total shots
Canon 1D Mark II with 70-200 f/2.8 IS: 19 shots (52.8%)
Canon 40D with 70-200 f/2.8 IS and 1.4x: 8 shots (22.2%)
Canon 5D with 24-70 f/2.8: 6 shots (16.7%)
Canon 5D with 12-24 f/4.5-5.6: 1 shot (2.8%)
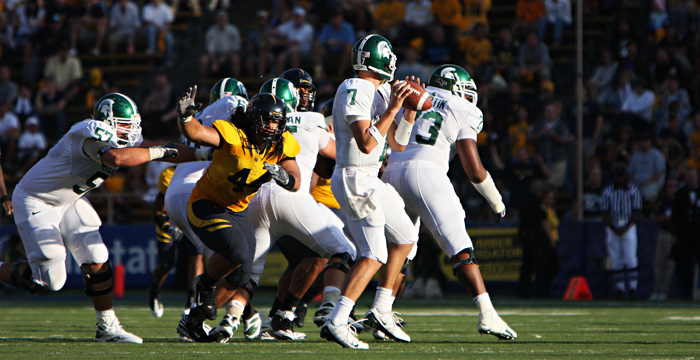
Taking a look at the best shots, the proportion shifts dramatically in favor of the midrange setup. Reviewing the photos, I think the primary reason for this is simply the far shallower depth of field at an f/3.6 vs f/6.4 equivalent. While a ton of the long-range photos like the one on the left were usable, the midrange setup with larger aperture produced a much cleaner background and isolated the subject better, which ends up being the key to differentiating usable/publishable photos from the best photos you’ll actually end up printing out or putting in your portfolio.


Kevin Riley prepares for the snap - effective 448mm, f/6.4 (left) vs. 230mm, f/3.6 (right)
Despite more of the “best” shots coming from the midrange setup, the extra reach on the long-range lens turned out to be just as versatile, considering it was used on 43% of the shots, even if they weren’t the absolute best ones. So how to make the long range setup more effective?
The smallish aperture was one of the culprits. There were numerous shots like these, that were *almost there* but just needed a touch shallower depth of field to seal the deal and make it a great shot:

Michigan St. QB Brian Hoyer hands off to halfback Javon Ringer
Looking over the shots afterwards, I also realized that even though the effective 448mm was long, it still wasn’t quite long enough in a lot of situations, which resulted in a bunch of mediocre-but-could’ve-been-good shots like these:

Defensive lineman Tyson Alualu goes after Michigan St. QB Brian Hoyer

Jahvid Best turns up the afterburners as he eludes a pack of Michigan St. defenders
After this first game, I was fairly happy with my midrange setup, which returned a lot of good quality shots. The 5D and 24-70 setup wasn’t really useful for sports, but as always it worked great for covering the various other more phtojournalistic aspects of the game:

The Golden Bears make their entrance into Memorial Stadium for the season opener against Michigan State

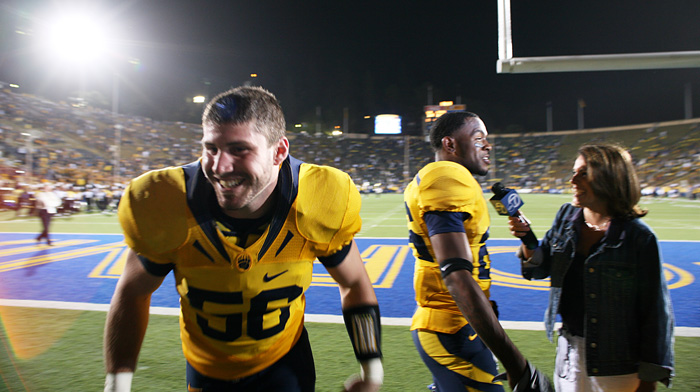
Zach Follett plays a joke during Darian Hagan's post-game interview
The only setup I knew I really wanted to improve was the long-range. It needed to be longer, and depth of field needed to be way shallower. So for the Washington State away game the next week, I would finally bring the big Nikon 400mm f/2.8 out on an assignment.
This is part 1 of 4 in Football Photography X’s and O’s, a 4-part series of insights on shooting football.
Part 1: Equipment Analysis 1 (Michigan State game)
Part 2: Aperture-priority Exposure Technique
Part 3: Lighting Situations
Part 4: Equipment Analysis 2 (Washington State game)

