Last time I left off, I had finished shooting my first football game and was left partially satisfied with most of my setup, yet wanting a bit more, especially on the very long end. For my second game the very next week, I traveled out with the team to Palouse, Washington, for an away game against the Washington State Cougars.

Clear skies in Palouse, WA at Washington State
Since the wide and mid-range setup worked just fine, I decided to stick with that, but on the long end I brought a Nikon D200 and Nikon 400mm f/2.8 non-VR lens (Nikon, yucky!).
Long range: Nikon D200 with 400 f/2.8 (35mm equivalent: 600mm f/4.2)
Midrange: Canon 1D Mark II with 70-200 f/2.8 IS (35mm equivalent: 91-260mm f/3.6)
Wide: Canon 5D with 24-70 f/2.8 (35mm equivalent: 24-70mm f/2.8)
Ultrawide: Canon 5D with 12-24 f/4.5-5.6 (35mm equivalent: 12-24 f/4.5-5.6
Handling the 600mm Beast
Compared to the Canon 40D with 1.4x teleconverter and 70-200 f/2.8 IS I had last time, the D200 equipped with a big prime like the 400 f/2.8 was a very different kind of beast. To start off, the setup was far more clunky – while a 70-200 and 40D can easily sling over your shoulder or around your neck, and can be handheld without a problem, the 400mm is heavy and on top of that really needs to be used with a monopod. This is problematic in a few ways:
- Monopods need to be set up. Sure, you can set it to a certain height, but this also somewhat restricts your vantage point. You might want to take some shots close to the ground to give the “imposing giant” perspective when looking upward at players. Or you may want to go up higher so that you can see “over” the offensive and defensive lines and actually get a shot of the quarterback. Using a monopod (same issue with a tripod) requires one to extend or contract the height in order to get the vantage point you want.
- It’s hard to run with a 10 pound lens. Football games require a lot of running around, moreso than most other sports. While baseball or association football (soccer) might sit all the photographers into a designated press box, football allows for some modest free reign back and forth along the sidelines and behind the end zones. This means you’ll do a fair bit of running back and forth, especially after any big plays that move the ball deep downfield, or any change of possession. With my more moderate setup the previous week, I could just barely make my way across the field after a change of possession, and it was impossible to switchover in time after a big offensive play. With a huge 400mm weighing me down, it was pretty much guaranteed that I couldn’t make my way across the field without missing at least half of the next play, and that was with a little extra hustle and sprinting than I’d normally put in.
- The 400mm can’t be dropped. One of the facts of sports photography is that no one lens will really cover it all (well, if you’re using quality primes/short zooms rather than cheap ultrazooms). Inevitably, you’ll need to switch from your long lens to your short, especially on a big play that breaks from say a far-away quarterback to a wide receiver who’s racing down your end of the sideline. Because my long-range was a prime (unlike the 70-200 zoom I had last time), the need to switch lenses on the fly was even more critical. Unfortunately, the weight of the 400 and its attached monopod means I couldn’t just toss it on the ground or flip it over my shoulder like I could with the 70-200 setup. I eventually learned to just sit the 400 gently on my lap when I needed to switch, but this solution resulted in a few missed frames and series, so it wasn’t ideal.
Beyond physical lens-handling issue, actually shooting with an effective 600mm angle of view wasn’t a walk in the park either. Obviously, the angle of view you’ll get is extremely narrow – just 4.1 angular degrees across the diagonal. Shooting from the sidelines, you’re typically relegated to focusing on just a single player, which can produce some cool shots but most of the time leaves you without any context whatsoever:

Cal quarterback Kevin Riley... uh... holds the ball? Not really sure what's going on in this photo.
Another issue with a 600mm equivalent is having far too narrow an angle of view – there simply isn’t much margin for error at all with regards to framing, which means a lot of cropped-off appendages and helmets.

Washington State's Chantz Staden can't quite get his feet and legs all in the frame.
In addition, the “viewfiner vision” with such a narrow angle of view means you’re primarily locked onto a single player and have no reliable way of anticipating where other players are or where they might interact, and the result is many frames of funky composition focused on a single player.

Christopher Ivory faces unknown out-of-frame obstacles

Cal quarterback Kevin Riley hands the ball off to someone awkwardly out of frame
To be fair, this was my first real experience using the Nikon 400, and I got much better as the game progressed, so this is certainly a learnable skill. One of the workarounds, for instance, is to shoot from the endzone rather than the sideline. This applies even when the line of scrimmage is way off on the other side of the field – the 600mm equivalent will reach far enough, but the cross-field distance now gives you more flexible working room. You don’t get the same close-up effect, but the results are still very good (and you’ll get a lot more keepers):

Cal cornerback Syd'Quan Thompson zeroes in on Wazzu receiver Brandon Gibson
All in all, the D200 and 400mm setup was a pain to use – its weight leaves you more worn out in the latter stages of the game, takes time to set up and takes time more to switch over to another zoom range, all of which result in missed shots and a more rushed pace while shooting.
The extremely narrow angle of view, while delivering fantastic close-ups, also lowers the keeper rate significantly. There were dozens of shots like those above which would have looked fantastic, save for the small framing errors that render them effectively useless.
Despite all this, there’s no denying that when it gets it right, shots from the D200+400 setup blew away anything I got with the 1dm2+70-200 midrange kit:

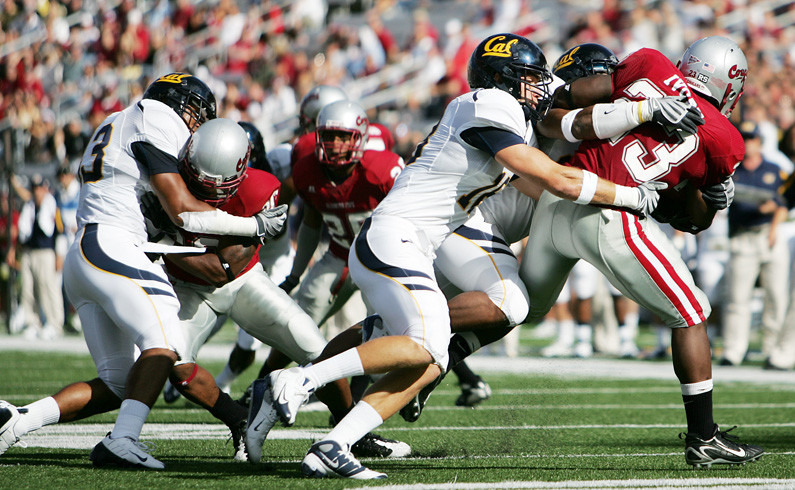
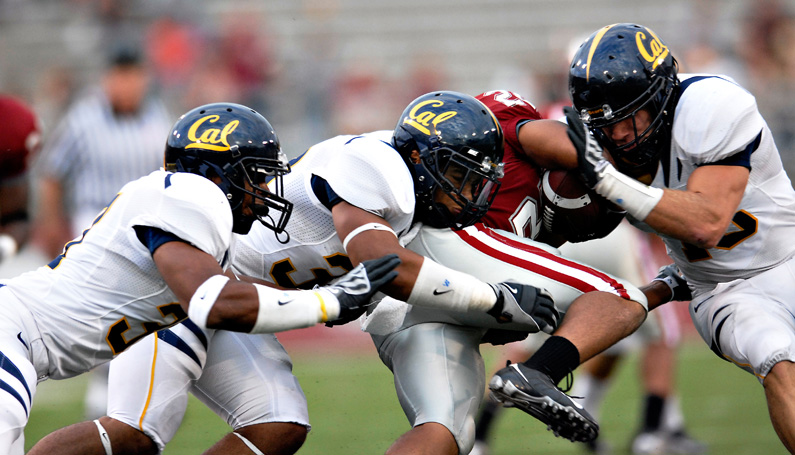
1D Mark II, 70-200: Cal defenders team up to bring down Washington State RB Christopher Ivory

Nikon D200, 400: Cal defenders team up to bring down a Washington State player

1D Mark II, 70-200: Cal quarterback Nate Longshore gets ready to hike the ball.

Nikon D200, 400: Washington State quarterback Gary Rogers talks to the sideline.
By the numbers
So numbers-wise, how did the game pan out by equipment?
324 total shots
Nikon D200 with 400 f/2.8: 187 shots (57.7%)
Canon 1D Mark II with 70-200 f/2.8 IS: 96 shots (29.6%)
Canon 5D with 24-70 f/2.8: 26 shots (8.0%)
Canon 5D with 12-24 f/4.5-5.6: 15 shots (4.6%)
Wowsers – despite all of the troubles I had with the 400 and all the shots I threw away, a majority of the “good” shots came from the long-range setup. This is in huge contrast to the 40% long-range proportion I got in my first game using the 40D and 1.4x+70-200 f/2.8 as my long-range lens.
The story isn’t dramatically different when taking at the selection of “best” shots that I included into my gallery for the game.
47 total shots
Nikon D200 with 400 f/2.8: 23 shots (48.9%)
Canon 1D Mark II with 70-200 f/2.8 IS: 16 shots (34.0%)
Canon 5D with 24-70 f/2.8: 6 shots (12.8%)
Canon 5D with 12-24 f/4.5-5.6: 2 shots (4.3%)
The long-range setup is still favored by a wide margin, especially compared to the long-range results from the week 1 game (just 22.2% of the gallery shots).
So after two games, my general conclusion is that the focal range/working distance tradeoff doesn’t matter too much – with a midrange 70-200ish zoom, you’ll be up-close at the sideline. With a huge 600mm equivalent, you’ll simply sit further back and shoot from the corners or back of the endzone, rather than the sideline.
The key here then is simply the depth of field and quality of the out-of-focus regions. In the first game, the midrange 91-260mm f/3.6 setup simply gave a shallower depth of field and better isolative effect than the long-range 157-448mm f/6.4. (If you want to boil it down to equivalencies, they’d be the same at 260mm f/3.6 vs. 448mm f/6.4, but at any focal length below the maximum 448mm, the midrange would have the advantage. For example, at 250mm you’d still be getting f/3.6 with the midrange, while you’d be stuck with f/6.4 on the long-range).
In the second game, of course, the 600mm f/4.2 long-range delivered far higher bokeh quality in most long-range situations, since most of the midrange lens’ shots would have to be cropped in further, quickly multiplying the f/3.6 aperture (if you wanted to crop down to a 600mm equivalent, the equivalent aperture would be f/8.3).

Zach Follett returns a fumble for a touchdown. This image was initially taken at 260mm f/3.6 equivalent, but after cropping becomes a 407mm, f/5.6 equivalent
Of course in close-range situations where the 90-260mm could provide a close-up without any further cropping, the f/3.6 aperture would actually edge the f/4.2 slightly, which is why the midrange is still capable of delivering plenty of shots that look equally as good from a technical standpoint:

Washington State halfback Christopher Ivory looks for a hole

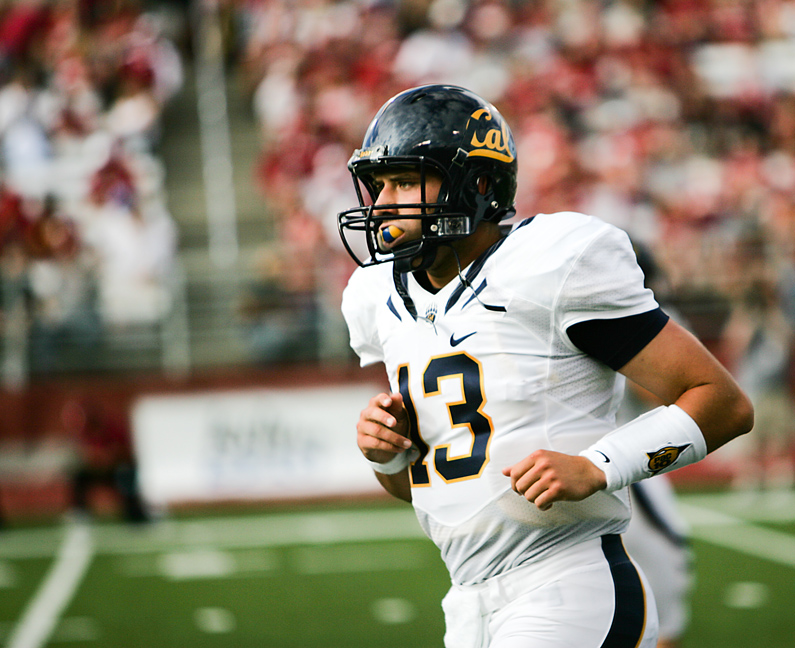
California quarterback Kevin Riley jogs back to the sideline
The Midrange vs. Longrange Tradeoff
The problem with using the midrange lens and achieving high-quality isolating shots, of course, is getting close enough to the subject in the first place. With the huge expanse of a football field, chances are that the major action or the player you’re trying to focus on won’t be close enough for a 260mm equivalent lens, so you’ll have to crop down.
Of course, there will be situations where the subject is too close for a long-range 600mm equivalent, which is no good either. However, you can always back up or move further downfield to give you more working room. With a midrange lens that doesn’t reach far enough, there’s no way to get any closer to the subject than your spot on the sideline. (This is the exact opposite problem faced by most photojournalists, landscape photogs, or travelers – oftentimes in these cases you’ll be able to get as close as you want, but you’ll often find situations with very cramped working room, so a wide-angle there is actually the most versatile.)
Of course, the reduced quality from wider shots can also be a blessing in disguise. While close-ups are the only way to maximize the shallow depth of field isolative quality, it also severely limits your margin for framing error, as well as awareness of outside-of-frame events, as seen in the 400 shots above. Having a wider lens gives you room to crop the perfect framing afterwards, and also catch action that suddenly moves up close to you.
So the tradeoff again boils down to that age-old equipment debate: quality or versatility? In most cases a large aperture long-range lens like the 400mm f/2.8 will deliver higher quality, except for rare cases where the subjects come close enough that a similarly large aperture 70-200 f/2.8 can match it. On the other hand, the more versatile midrange lens will always afford you greater versatility and margin for error (with cropping, its framing possibilities are a superset of a longer-range lens).
As a photojournalist, and entering my first game and a half with that mindset, my initial preference would be for the midrange lens. True, quality won’t be as consistently good, but the journalist’s mindset is to simply cover every facet of the game, which means getting a usable shot from every play. For the photojournalist, it’s more important to get the shot of the crucial game-changing interception, than it is to come back with five generic portrait-like images that could appear on a Sports Illustrated cover. With this kind of approach, you’ll come back with a huge volume of photos, and chances are if the sports writer wants an accompany photo of specific play or player, you’ve got it. Job accomplished.
Towards the end of this second game, however, and partially with the assurance that I had already bagged plenty of usable images during the first half, I began to experiment much more with the long-range and getting better, more selective shots. Yes, it meant missing probably dozens of shots due to bad framing, or players racing too close to my end of the field, but the few shots you do end up with using the long-range lens are most likely the ones that will end up on a magazine cover or in your portfolio.
While I’m still fairly a novice at this, I think the second approach is ultimately the solution to becoming a good sports photographer. Most of the struggles, especially with regard to framing errors, are just that – errors that can be improved upon with training and experience. As you get better, the keeper rate goes up, eventually (hopefully) to a point where you’ll be able to sufficiently cover all the major events or action despite using a more restrictive long telephoto.
The other equipment-related solution is a massively large aperture zoom lens. Hopefully one of these days I’ll get a chance to play with a Sigma 120-300 f/2.8 or Sigma 200-500 f/2.8 for sports photography – either of these would be an absolute dream lens for sports photography.
This is part 4 of 4 in Football Photography X’s and O’s, a 4-part series of insights on shooting football.
Part 1: Equipment Analysis 1 (Michigan State game)
Part 2: Aperture-priority Exposure Technique
Part 3: Lighting Situations
Part 4: Equipment Analysis 2 (Washington State game)
Tags: california bears, Chantz Staden, Christopher Ivory, football, football equipment, football photography, Football photography X’s and O’s, fumble return, Gary Rogers, Kevin Riley, Martin Stadium, Nate Longshore, Nikon 400mm, Nikon 400mm f/2.8, Nikon 400mm f/2.8 (non-VR), Palouse, sports photography, Syd'Quan Thompson, viewfinder vision, washington state, washington state cougars, Zach Follett

